[musings]
又开始打地基,把一些基础的底层原理都过一遍,写博客的原因也是因为想通过费曼学习法来加深印象,免得学了又忘,忘了又学
浏览器引擎
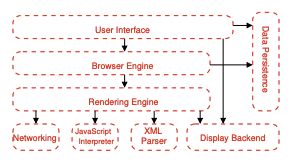
引用来自https://grosskurth.ca/papers/browser-refarch.pdf
渲染过程分为: 网络 , js解析 , UI渲染
UI渲染又包括, html解析,css解析
这里就贴一下盒子模型的图片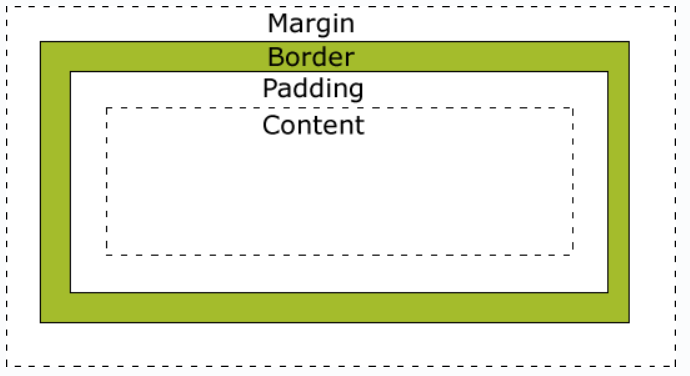
EventLoop
浏览器中的进程与线程
浏览器进程
网络进程
渲染进程
我们主要看渲染进程包含: HTML 解析,css解析,计算样式,处理图层,执行全局js代码,执行事件处理函数,计时器callback 等等
我们主要来看下EventLoop的过程,总共有三类任务,也就有三个队列
微队列:优先级最高,e.g Promise
交互队列: 优先级高,存放用户交互以后的任务
延迟队列: 优先级中,计时器到达后执行的任务
case 1:
1 | function a() { |
详解: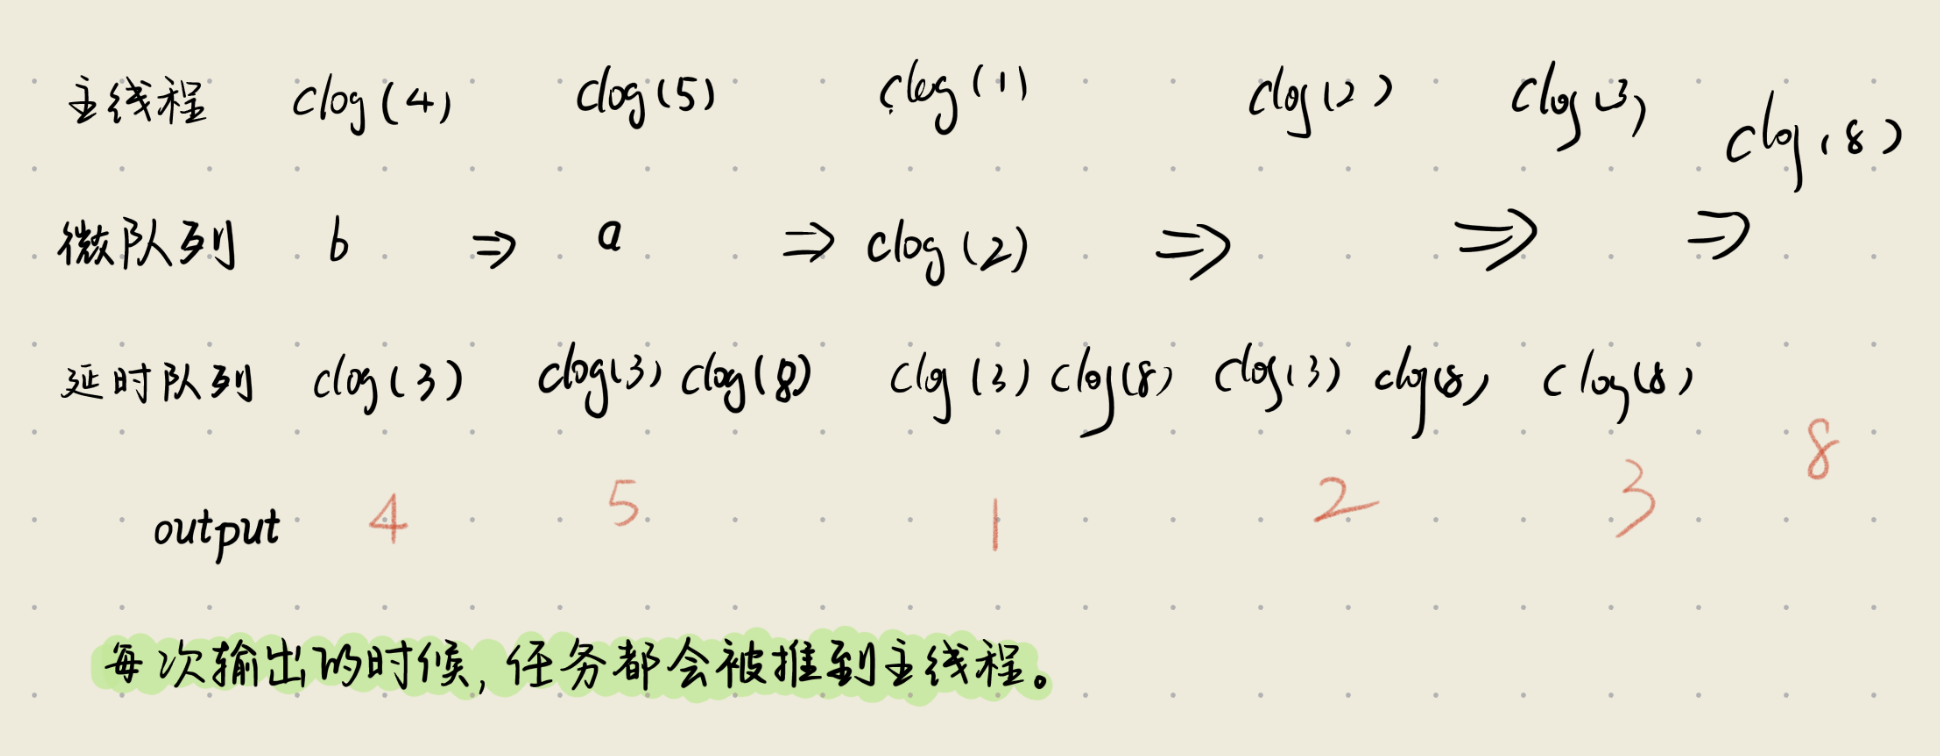
Case 2
1 | console.log(1) |
引入新case:
1 | function a() { |
为什么?
因为第一个case里本身的整个a()都是在微任务队列中,所以即使tick的任务优先级更高,但是现在在微任务队列里,会先执行微任务队列,直至清空
1 | function a() { |
这个case需要注意的是整个a方法被丢入到微任务队列,但是整个第二个a方法先执行,且当第二个a方法主栈任务执行完毕以后,会走tick队列,然后走微任务队列,此时的微任务队列里有a方法本身
具体步骤:
🧠 执行流程详解(按时间线)
第一步:执行所有同步代码
遇到 Promise.resolve().then(() => a()) → 把回调加入 微任务队列
执行 a()(同步调用):
console.log(1) → 输出 1
process.nextTick(() => console.log(20)) → 加入 nextTick 队列
Promise.resolve().then(() => console.log(2)) → 加入 微任务队列
✅ 当前状态:
输出:1
nextTick 队列:[ () => log(20) ]
微任务队列:[ () => a(), () => log(2) ]
⚠️ 注意:同步代码还没结束!a() 是同步调用的,所以它完全执行完才算同步结束。
第二步:同步代码结束 → 开始清空 nextTick 队列
执行 () => console.log(20) → 输出 20
✅ 输出现在是:1, 20
✅ 这就是同步调用的 a() 中的 nextTick 立刻生效!
第三步:清空 微任务队列
微任务队列当前是:[ () => a(), () => log(2) ]
按顺序执行:
执行 () => a()(这是你在 Promise.then 里注册的)
console.log(1) → 输出 1
process.nextTick(() => console.log(20)) → 加入 nextTick 队列
Promise.resolve().then(() => console.log(2)) → 加入微任务队列
✅ 输出追加:1
✅ 现在:
nextTick 队列:[ () => log(20) ](来自这次 a())
微任务队列:[ () => log(2)(来自第一次 a), () => log(2)(来自第二次 a)]
继续清空微任务队列(因为还没空!)
执行第一个 () => console.log(2) → 输出 2
执行第二个 () => console.log(2) → 输出 2
✅ 输出现在是:1, 20, 1, 2, 2
第四步:微任务队列终于空了 → 清空 nextTick 队列
执行 () => console.log(20)(来自微任务中调用的 a())→ 输出 20
✅ 最终输出:
1 ← 同步 a()
20 ← 同步 a() 的 nextTick
1 ← 微任务中的 a()
2 ← 第一个 Promise.then(来自同步 a)
2 ← 第二个 Promise.then(来自微任务 a)
20 ← 微任务 a() 的 nextTick